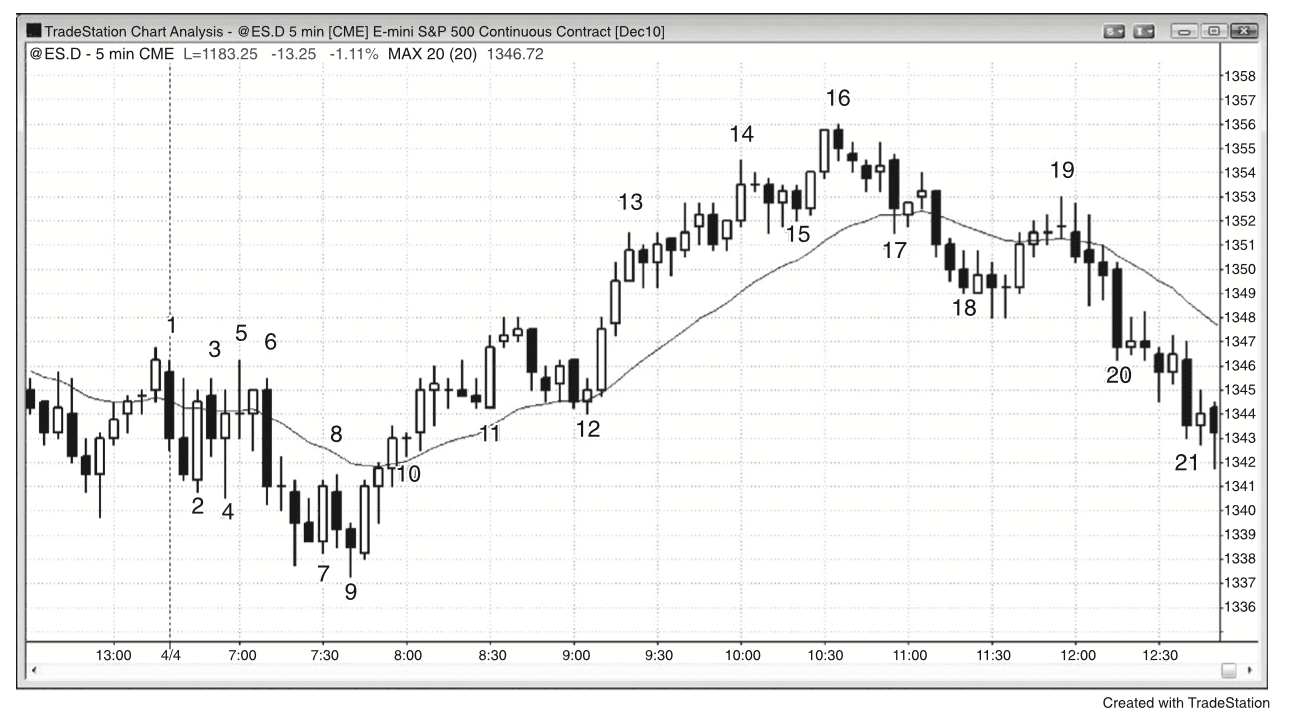
Chương 19 — Hình minh họa
Figure 19.1 — Measured Move after Breakout of Small Opening Range
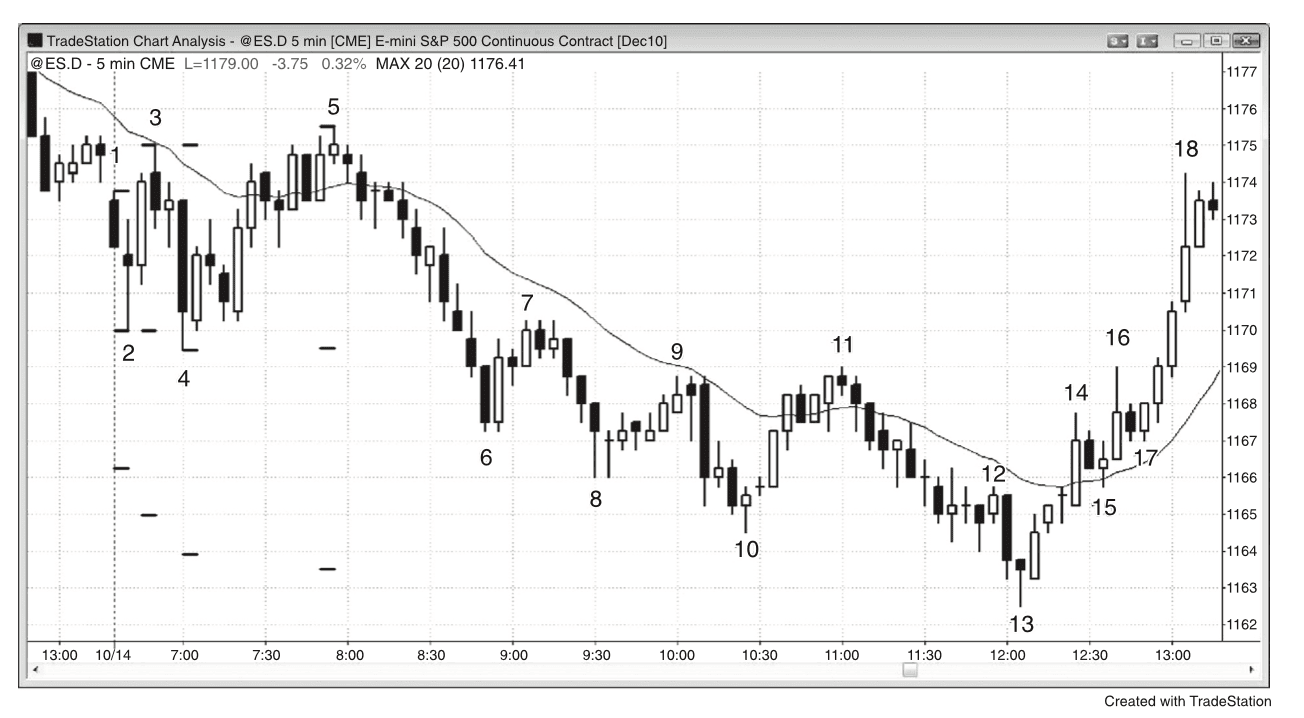
Figure 19.2 — The Size of the Opening Range Is Important
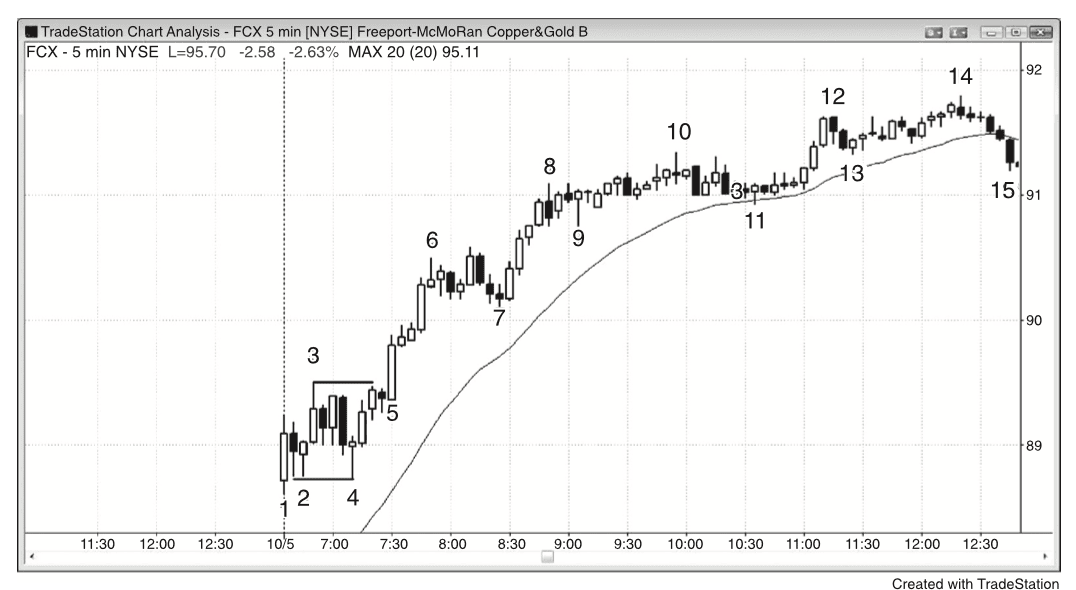
Figure 19.3 — Breakout Pullbacks on the Open
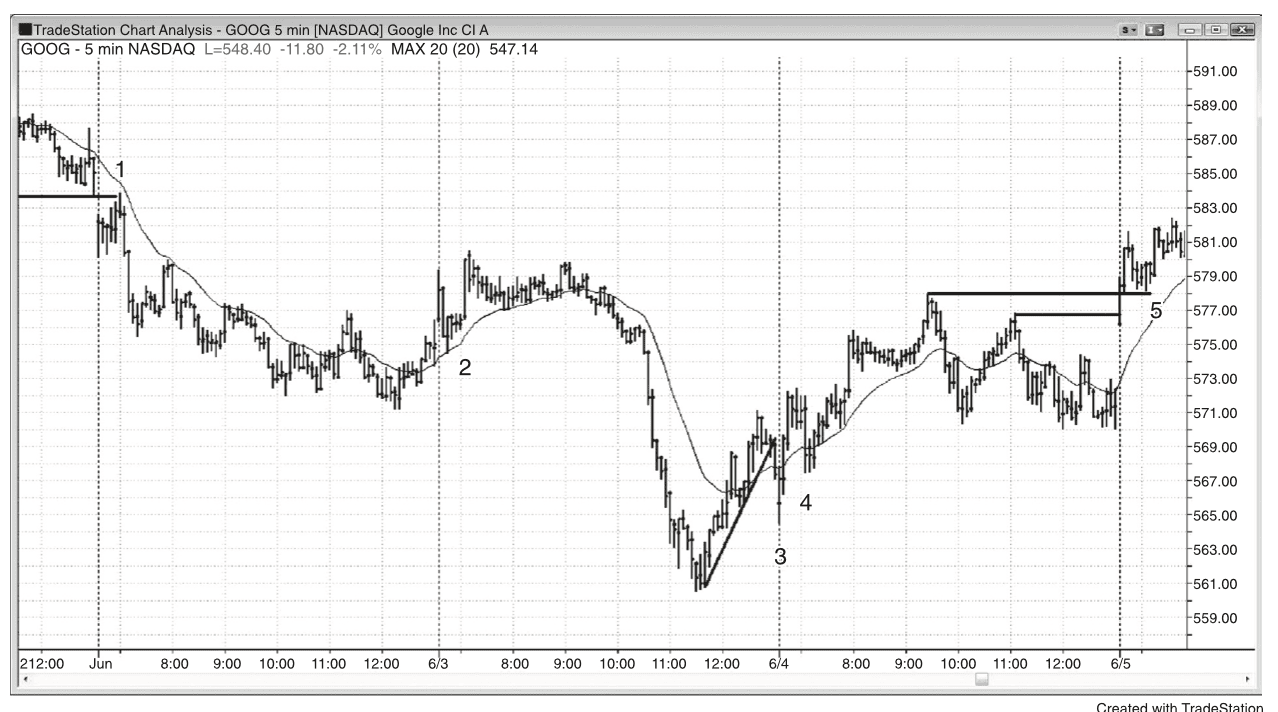
Figure 19.4 — Early Failed Breakouts
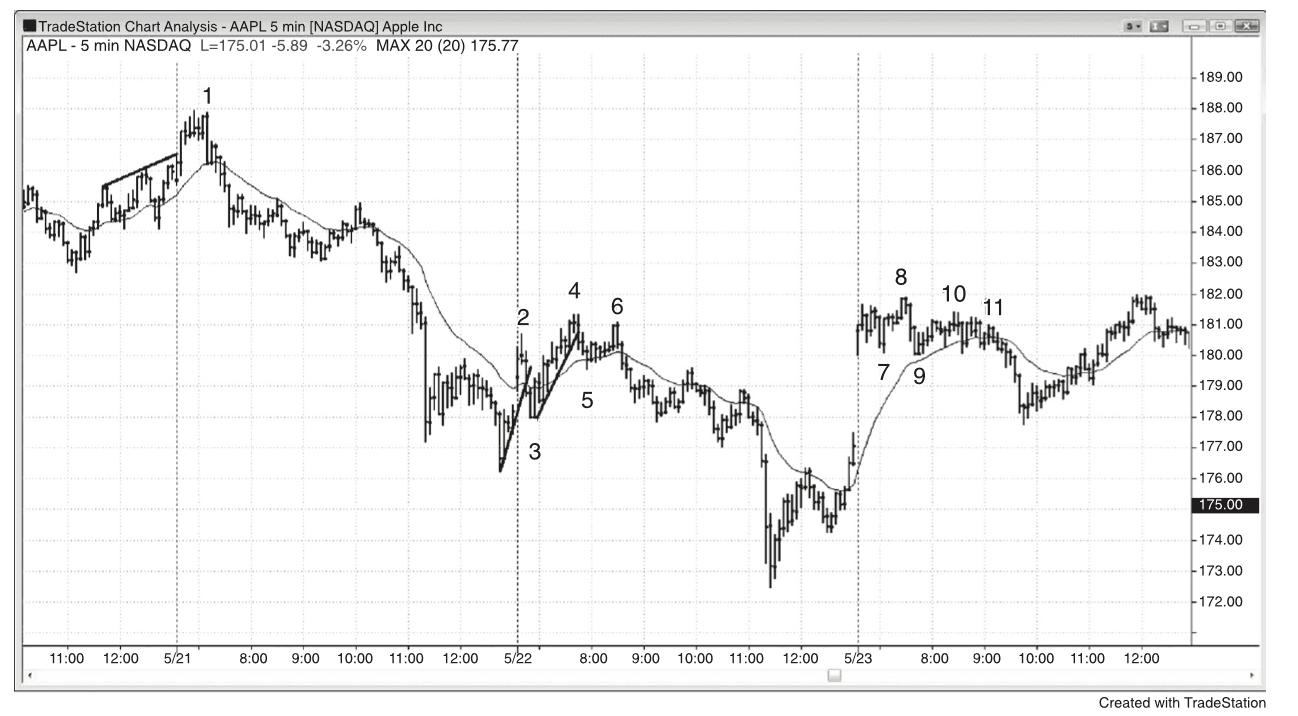
Figure 19.5 — Both a Gap Down and a Gap Up Can Lead to an Opening Rally
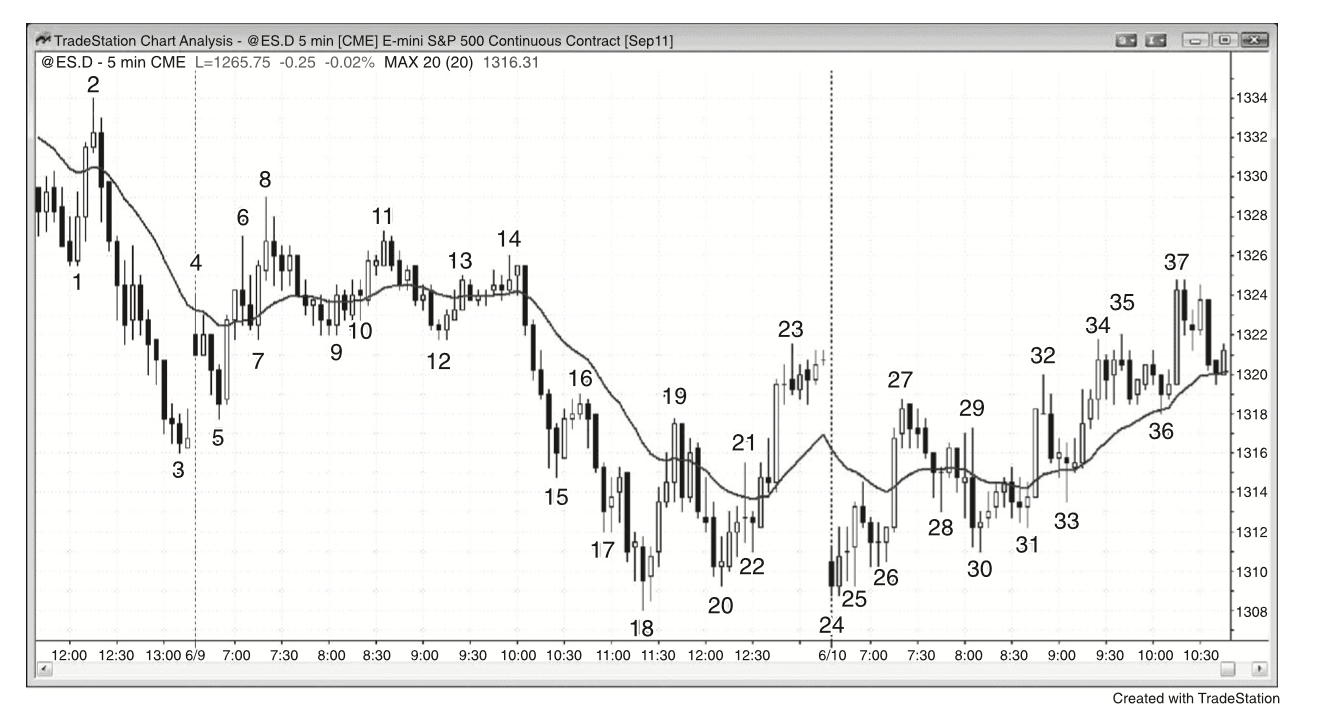
Figure 19.6 — Two-Legged Pullback after Gap Opening
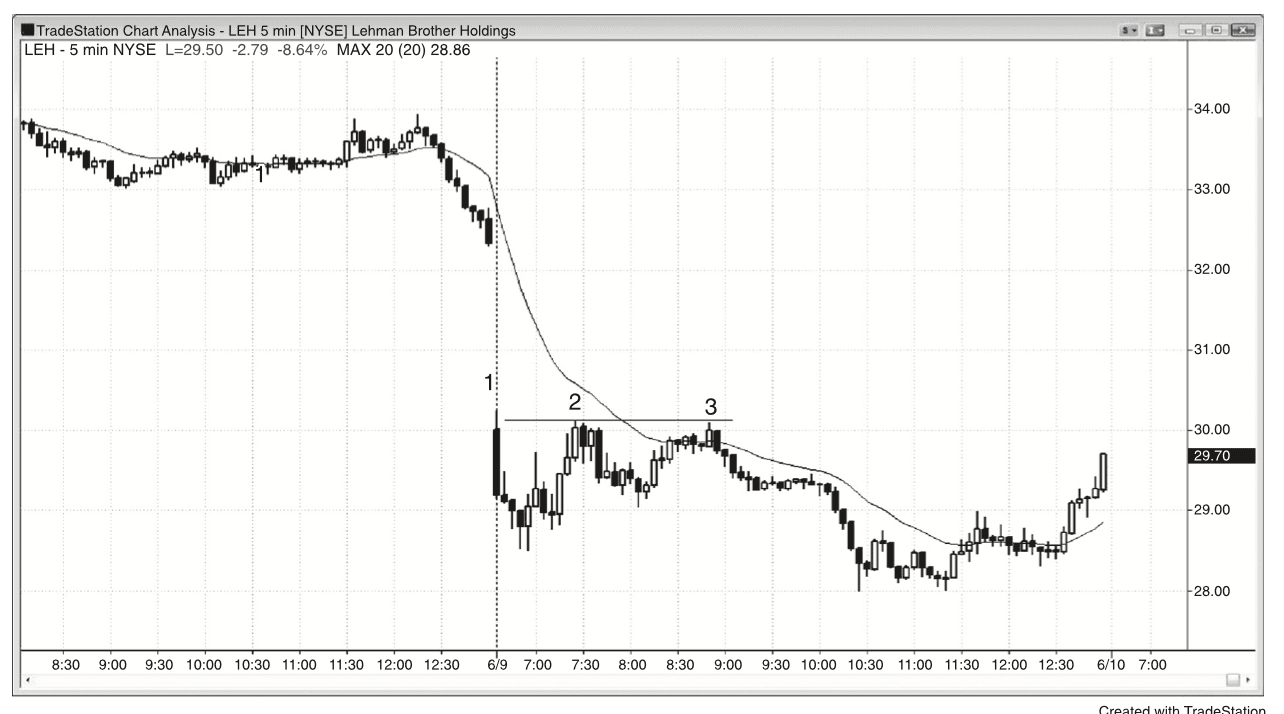
Figure 19.7 — Double Bottom and Top Flags
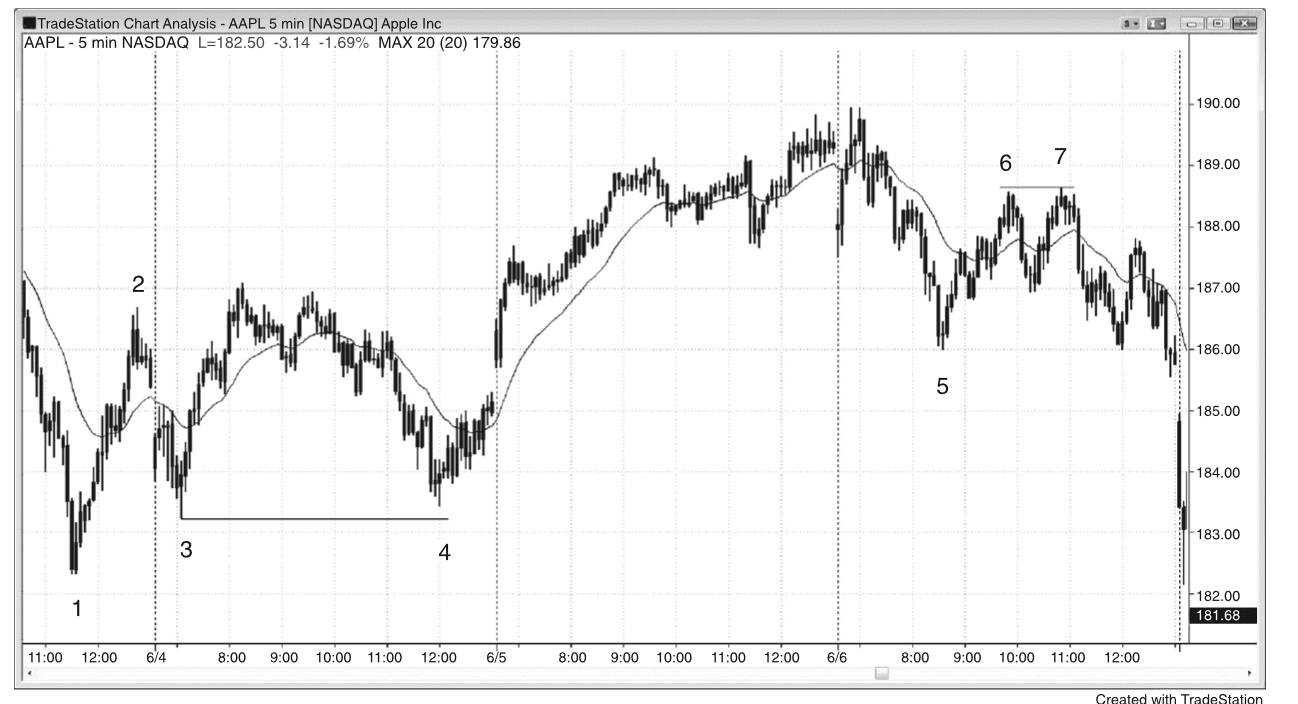
Figure 19.8 — Two Failed Attempts and Then a Reversal
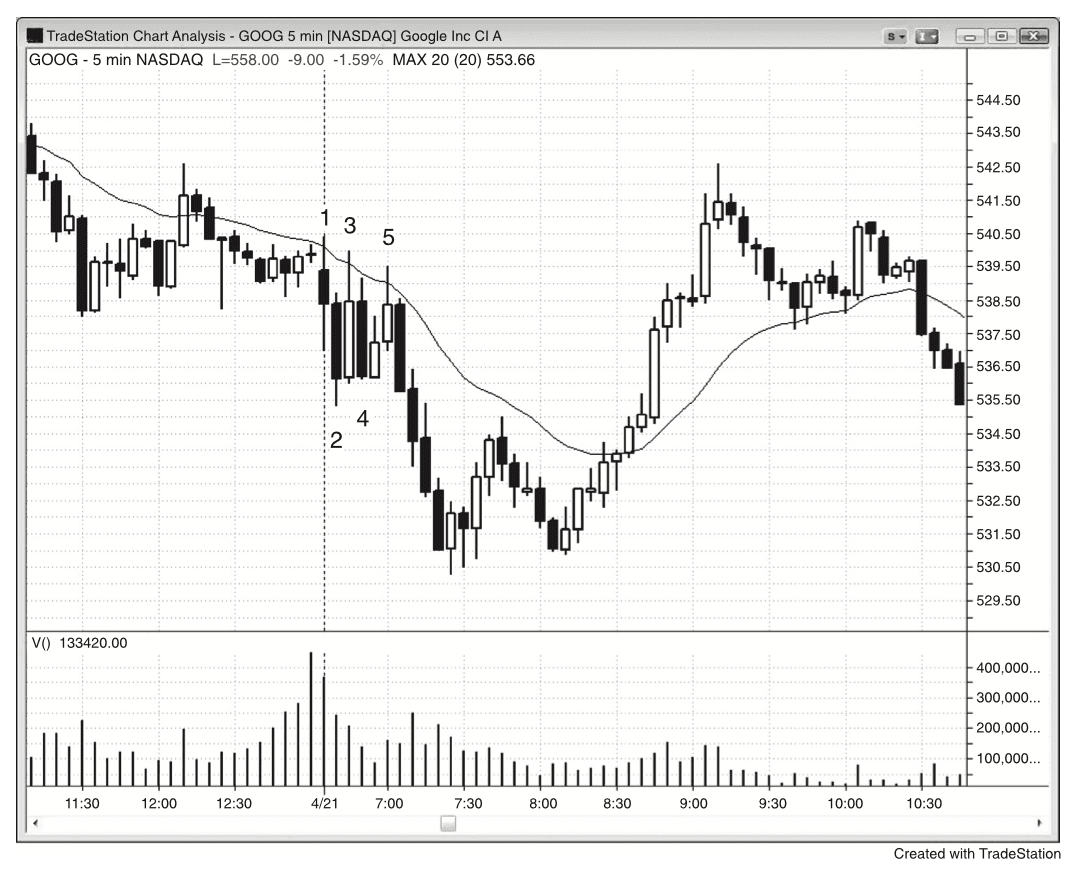
Figure 19.9 — Barbwire on the Open